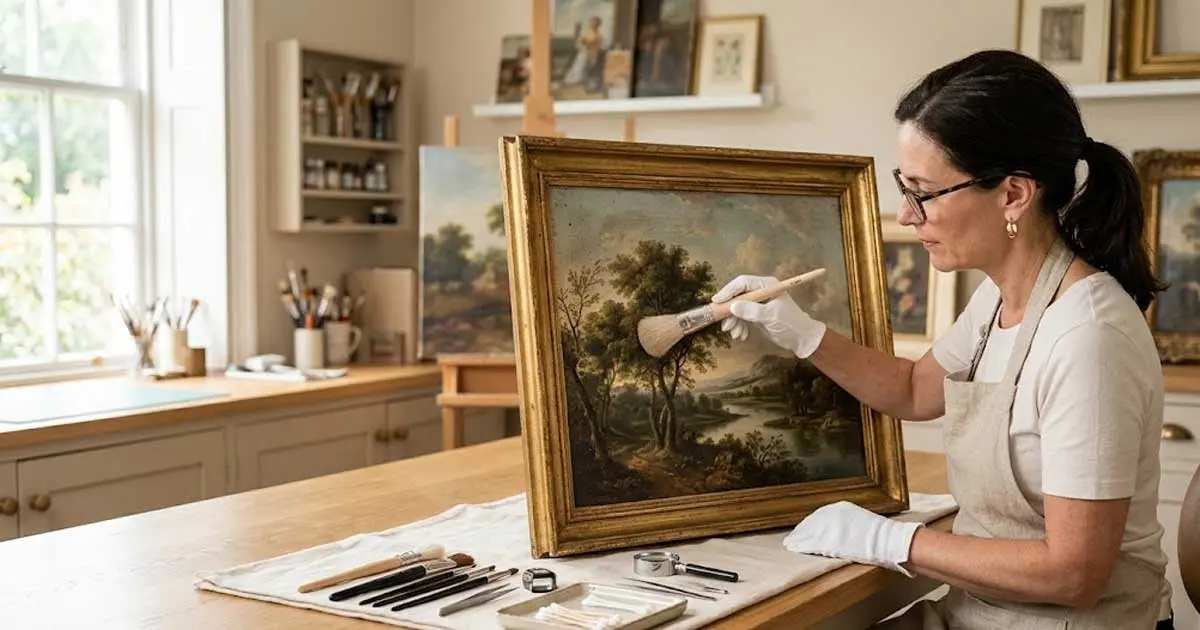
The safest thing you can do at home to clean an oil painting is to remove loose surface dust with a soft, natural-hair brush. Dry dusting with a soft, natural-hair brush is the only cleaning that should be done at home. This is the basic rule: dust only with a dry dusting brush, and for the most part, this will suffice for regular upkeep for any privately owned oil painting in normal conditions. All other is at serious risk of permanent damage.
This guide will show you how to do it safely, what the Q-tip test is, why it’s important, what you should never do and when a professional conservator is the only option.
Key Takeaways
- Dry dusting with a soft natural-hair brush is the only cleaning that should be performed at home on an oil painting. Beyond this, grime removal, varnish cleaning, stain treatment, etc. needs a professional conservator.
- The Q-tip test is always done before any wet cleaning: take a cotton swab, dip it in the colour, gently rub a small inconspicuous corner and check if any colour transfers. If there is colour on the swab, discontinue and contact a professional.
- Never use household cleaners, vinegar, baby wipes, saliva substitutes, magic erasers, furniture polish or oil based products on the painted surface. These can cause the paint and varnish layers to swell, abrade, dissolve or permanently discolor.
- Restoration work is not something that the professional conservator should do. They have been trained in art history, chemistry and studio practice and can evaluate the condition of the painting prior to touching it.
- Take photographs of the painting in raking light (light from the side to reveal surface texture) before cleaning or treating.
- Oil paintings should be stored in a place that is free of direct sunlight, smoke, humidity in excess of 55% and temperature extremes. These environmental factors contribute more damage than surface dirt.
- If the painting has yellowed, is dull, has smoke residue, flaking paint, mould, water damage or has been improperly restored by an amateur, it should be taken to a painting conservator immediately without any attempt to clean at home.
Why Oil Paintings Require Special Care
Oil painting is not just a piece of canvas with paint streaks. It is a multi-layering technique that involves the preparatory surface applied to the canvas, the underdrawing, several layers of paint applied in sequence over days or weeks and, in most cases, a varnish coat applied over the finished paint to protect the surface and to soak up the colours.
Oil paintings are typically painted on canvas or wood panels. The paint is composed of pigments in a drying oil, typically linseed, walnut or poppy oil. It dries to a pliable but brittle film which can be harmed by improper cleaning.
The chemical characteristics of each of these layers varies, as does each layer’s vulnerability. The outermost layer called varnish yellows with age and can be cleaned by a conservator. Paint layers below cannot be replaced. When paint is abraded or removed, or when it is chemically changed, it is gone for good.
The age of the painting complicates matters even more. The paint may have become brittle with age, as it once was flexible when applied decades or centuries ago. The transparent varnish can have yellowed or cracked. A taut canvas could have lost material around the edges or have been torn in the middle. A 100-year-old oil painting should only be cleaned by professionals as there are possible layers of varnish and lead-based paints.
The first step in understanding an oil painting is to understand this complexity of structure, because if you don’t, you will not be able to understand why most cleaning methods that work on other household surfaces will fail to work on an oil painting.
Step 1: Assess the Painting’s Condition Before Touching It
Look at the painting thoroughly before taking any action. Take it to a window or use a strong directional lamp held to the side of the painting (this is known as raking light) to show surface texture, paint lift, cracks and canvas deformation that are not visible in flat frontal lighting.
Prior to choosing a method of cleaning an oil painting, test the varnish and paint for stability under raking light. Record any flaking or cracks, with photographs.
Take pictures of what you see. These condition photographs are part of the painting’s provenance record, a document that documents the state of the painting at a particular moment in time, if there is monetary or sentimental value. This documentation can be helpful in case of insurance claims as well as for future professional treatment. Continued care should follow the same guidelines used in the acquisition of art: condition, value and authenticity prior to decision. The Shani Levni guide to the value, analysis, and interpretation of artwork deals with the framework that is used by professionals to determine the condition of the painting as part of its overall value, and is directly applicable to any decision regarding cleaning.
Stop immediately and call a professional conservator if you see any of the following:
- Flaking, lifting and pulling paint from the canvas
- Cracks through all layers of paint to the canvas (active, not age cracks)
- Torn, punctured or badly warped canvas
- Mould or mildew – a powdery or fuzzy growth anywhere on the painting or on the back of the painting.
- Water marks or tide marks on front or back
- Evidence of insect damage (fine powdery debris, small holes)
- Any previous restoration that appears to be unstable or discoloured.Any previous restoration that appears to be unstable or discoloured.
- Smoke or dirt layers that have accumulated over many years
Conditions that always call for professional intervention: yellowed or discoloured varnish, dirt or smoke residue on the surface, peeling or flaking paint, water damage or staining, mould anywhere on the painting or frame, insect or rodent damage, previous amateur restoration work that needs rectifying, and any painting of substantial financial or emotional value where the risk of damage outweighs the benefit.
Step 2: Collect the Appropriate Tools
If you need to dust surfaces at home, you need very little for safe dusting just dry surface dusting.
What you need:
- A soft natural hair brush (goat hair mop brush, squirrel hair brush or a large clean watercolour brush). The bristles should be loosely held and very soft.
- Wash white cotton gloves to prevent the transfer of skin oils to the canvas/paint surface
- Photography equipment (camera or phone) for before and after photos of the painting.
- Good light – either natural indirect light or a directional lamp
Do not use and what you don’t need:
- Microfibre cloths (will not work on oil paint when it first comes out of the paint tin)
- Paper towels or tissues (fibres can get caught in the loose paint)
- Cotton wool (fibres snag)
- Any liquid, spray or chemical product used for surface cleaning in the home.
Use clean gloves to prevent oils from your hands from getting transferred to the painting surface. Skin oils can leave marks that are hard to remove and may become a problem over time if left on the paint.
Step 3: Dry dust the surface
The only safe home cleaning method for an oil painting’s painted surface is dry dusting.
Begin at the top of the painting and apply brush strokes in horizontal slow strokes Hold a vacuum nozzle about 6 inches away from the surface to collect the dust as it drops. Do not allow the vacuum to come into contact with the canvas.
Grasp the brush lightly, without any pressure of the palm. Make overlapping horizontal passes from top to bottom and left to right. The objective is to remove and raise dust-free surfaces without any abrasive contact between brush and paint.
A vacuum with a distance of 15-20 cm from the painting surface can help to trap any loose dust that may fall off before it can settle again. Set the vacuum to the lowest setting. The vacuum attachment should never come in contact with the canvas, frame or painted surface directly.
Dust is a material that is hard on surfaces. Just rubbing a cloth over the surface is like sanding the painting with tiny bits of sand. Use a high quality soft bristle brush, preferably a goat hair mop brush or very soft synthetic fan brush.
Cleaning the Frame
Clean the frame, but not at the same time as the painted surface.
Clean the frame, but do not touch the paint, Use a piece of card or thin card between the edge of the frame and the canvas to provide a barrier and then dust the frame separately with a soft brush or a damp cloth that is suitable for the type of frame.
Use only soft brush for gilded frames. If the frame is painted wood, a lightly moistened cloth will do. A soft brush is better suited for any frame that has ornate, carved pieces than any cloth.
Step 4: The Q-Tip Test (Before Any Wet Cleaning)
If the painting is not just dusty, but it is visibly dirty, sticky or discoloured, then the Q-tip test will tell you whether you can apply any moisture to the surface or not before you start.
Professionals always start in a corner. Choose a dark or inconspicuous area. Wet a cotton swab (not wet, damp) and gently roll it over a one-inch square. Do not rub. Roll. If you notice colour on the swab that is similar to the painting, you are not cleaning dirt – you are removing paint. When that happens, it’s time to leave and call in a professional conservator.
Do not use tap water on the swab. Minerals and chlorine in tap water may leave a residue or react with the paint surface.
If the swab picks up grey or brown dirt (no colour) the surface has passed the basic test and may be very carefully wet cleaned of the varnish surface. If any colour rubs off, discontinue completely.
What You Can Try at Home (With Caution)
When the Q-tip test does not reveal any colour transfer, and the painting does not have any flaking paint or active damage, the following methods are employed by conscientious home collectors to remove light surface dirt from a varnished painting.
Distilled Water, cotton swab
Dampen a clean, soft cotton swab with distilled water. Roll gently in 1” sections, avoiding rubbing. Immediately follow with a dry swab to remove residual moisture. Only work on small portions.
Change the swab frequently. A dirty swab is collecting dirt on the surface, while a coloured swab is collecting dirt from the surface. Those are two distinct and significant outcomes.
The Saliva Method
For centuries saliva has been used by conservationists. Use a clean cotton swab, wet it in the mouth and roll it over the surface. Human saliva contains enzymes, in particular amylase, which break down organic material and, when combined with distilled water, are slightly more effective at removing light surface grime without damaging paint.
It’s not a folk remedy. It is an actual documented technique of conserving and using it selectively in the same manner as distilled water cleaning. It should be used only for a light surface film of dirt on a well varnished painting.
The Bread Method
The inside of fresh white bread rolled up into a ball can be used as a soft eraser on the surface of the painting. Dab and roll the bread ball gently over the surface, using a clean bread ball each time it gets dirty.
This is done by the slight stickiness of the bread removing loose surface particles. It can only be used in the case of very light dusting and does not present any chemical risk to the paint surface. Not suitable for sticky dirt, smoke deposits or anything that needs dissolving not lifting.
What Never to Use on an Oil Painting
These are the materials that can harm oil paintings and should never be applied to the surface of the painting.
| Substance | Why It Causes Damage |
| Household glass cleaner (Windex, etc.) | Ammonia dissolves and strips varnish and paint binders |
| Vinegar or any acid | Acidic pH attacks paint layers and canvas sizing |
| Baby wipes | Contain surfactants and alcohol that strip varnish |
| Magic erasers (melamine sponge) | Highly abrasive micro-fibre structure — physically removes paint |
| Furniture polish or wax | Leaves residue that alters surface appearance and attracts dust |
| Linseed oil or any oil | Darkens the surface, attracts grime, and does not clean |
| Turpentine or white spirit | Dissolves varnish and paint layers simultaneously |
| Tap water | Minerals and chlorine can leave residue and damage canvas sizing |
| Soap not formulated for paintings | pH imbalance and surfactant residue damage paint surface |
Avoid solvents, vinegar, baby wipes, magic sponges or oils. These can abrade and discolour varnish and paint, and swell. The results are often irreversible.
When to Call a Professional Conservator
Museum paintings need not be treated as a luxury by professionals. It is the right answer to any cleaning task other than dry dusting, for any painting, irrespective of the financial, historical or sentimental value.
A conservation professional doesn’t just clean a painting. They check the condition of all layers (canvas, ground, paint, and varnish) prior to touching them. They employ solvents that are chosen specifically for the age, medium and condition of the painting. They record their actions and their reasons. They know when to stop.
Professional conservators employ specialized solvents, pH-balanced cleaning agents and precision equipment, such as micro-brushes and controlled suction devices. They can selectively remove the old varnish without affecting the paint layers below, which is something that no technique at home can do.
The process for selecting a qualified conservator
The American Institute for Conservation (AIC) has a searchable directory of qualified conservators in the U.S. at culturalheritage.org. The Institute of Conservation (ICON) also offers a service called Find a Conservator in the United Kingdom. In Australia, there is an equivalent directory maintained by the Australian Institute for the Conservation of Cultural Material (AICCM).
If you call a conservator, be sure to request a conservator who has experience with paintings conservation. Conservation is a general term and there are other materials such as paper, textiles, or furniture in which some conservators specialise.
Cleaning is important, and understanding oil paint layers is crucial
Understanding the composition of oil paint can help to understand which methods of cleaning are safe and which are not. As a result of formal training in oil painting, through oil painting classes, the painter learns how to use paint, how it reacts when applied, how it dries and cures, and how the different mediums and varnishes react to each other. That knowledge is instantly transferable to understanding why the painted surface is more vulnerable than it seems.
Oil paint is not evaporated dry. The oil in the paint will polymerize with oxygen over weeks and months and creates a hard but not firm polymer film. Over decades this film changes very slowly, thus old paint can become brittle. However, the varnish layer above it is chemically different from the paint itself and a knowledgeable conservator can strip off the varnish without harming the paint medium below if they know which solvents will affect the paint and which ones will affect the varnish.
How to Avoid the Need for Long-Term Care Cleaning
The most effective maintenance plan for an oil painting is to avoid the buildup of dirt, dust and environmental damage as much as possible, and only intervene as little as possible, either professionally or by the painting’s owner.
Light and UV
One of the quickest causes of harm to an oil painting is direct sunlight. Pigments fade and paint films become brittle over time due to UV radiation. Avoid direct sunlight on paintings and use UV filtration glass or acrylic glazing for paintings in bright spaces.
Temperature and Humidity
To avoid further dirt build-up, hang your oil painting in a stable space that is protected from direct sunlight, smoke (fireplaces, smoking) and humidity and temperature changes.
The recommended range for relative humidity of oil paintings on canvas is 45% – 55%. Canvas and paint below 40% can dry out and become brittle. When the humidity is above 65% mould is a possibility and canvas may move quite a bit with every humidity cycle.
The expansion and contraction of canvas due to temperature changes creates stress in the paint layers. It is better to have a room that is always cool or moderate rather than cold and warm every day.
Smoke and Cooking Residue
Oil paintings are not well suited for kitchens or rooms with fireplaces or wood stoves. Over time, cooking grease and smoke particulates settle onto horizontal surfaces and then onto vertical surfaces, resulting in the most common cause for dull, yellowish grime film that is seen on paintings and requires professional cleaning. Cleaning is designed to remove the accumulation; moving a painting away from these environments prevents it from being accumulated.
Framing
Glazed frame (conservation grade UV filter glass or acrylic) significantly reduces the build-up of surface dust and grime. The glazing should not come in contact with the painted surface. Condensation contact is avoided by placing a spacer between the glass and the painting.
The care of a newly acquired oil painting
The first year of owning an original oil painting is a time to observe, not intervene, for collectors who have recently purchased an original painting from a gallery, auction or private sale.
Exhibit the painting in its new setting for at least one season before deciding on cleaning or conservation. Test the seasonal changes in humidity on the canvas. Determine the new location of the painting and how it is exposed to light, and if there is any risk of UV exposure. Take photos documenting the condition at acquisition.
For collectors who have acquired paintings in the original condition, the documentation of the painting’s history and the condition report issued by the gallery or auction house at the time of sale should be maintained with the painting. The Shani Levni certificate of authenticity for artwork is an explanation of what documentation a buyer should expect with an original painting and how this documentation will add to the painting’s value and care history.
If you have recently purchased collectible original oil paintings, including those that have market or cultural value (as described in the Shani Levni guides to Bob Ross paintings for sale), you will discover that the principles of cleaning and conservation listed above apply to an original painting from any time period, whether it is contemporary or older. The age of the paint has an impact on the approach, but not the principle: dry dusting at home, professional conservator for all else.
Conclusion
One of the most important rules for cleaning an oil painting is restraint. Well-meaning amateur cleaning, whether by kitchen cleaners, baby wipes, cloths or even enthusiastic rubbing, can often cause more damage and cost more to fix than the dirt it is supposed to clean. Inappropriate care is responsible for damaging many paintings that are brought into conservation in poor condition.
The practical guidance is distilled down to 2 sentences. At home, dust lightly with a soft natural-hair brush. For all other grime, varnish yellowing, staining, flaking or damage, use the AIC or ICON directories to locate a qualified conservator, and have someone who has the right training, tools and knowledge make the decisions.
A painting that is not exposed to extremes of humidity, smoke, or direct sunlight, but is dusted every so often and protected from direct sunlight will need professional intervention infrequently. If it does, the outcome of good conservation is a painting that will appear as it was intended to appear and will last for another generation.
Browse the entire library at Shani Levni for more information on art care, art collecting, and the practical aspects of owning original art.
Frequently Asked Questions
What is the best way to wash an oil painting in the house?
Dry dusting with a soft natural-hair brush is the only cleaning that should be performed at home to an oil painting. Grasp the brush lightly, sweep horizontally from top to bottom and vacuum the dislodged dust with a vacuum cleaner held 6 inches away. If you need to remove grime, varnish or stains, a professional conservator is necessary for the job.
Is it possible to clean an oil painting with water?
As a regular cleaning routine, water should not be used on the painted surface of a home oil painting. When the Q-tip test (using distilled water to dampen a swab and then rolling it on an inconspicuous corner) produces no colour transfer, a very light surface grime on a stable varnished painting can be treated with distilled water on a cotton swab. Tap water must NOT be used. Any type of dirt that’s significant needs a professional.
Which of the following should not be used to clean an oil painting?
Avoid using household glass cleaners, vinegar, baby wipes, magic erasers, furniture polish, linseed oil, turpentine, white spirit, or tap water on the painted surface of an oil painting. All of these can cause permanent damage to the layers of paint, varnish or canvas. The results are irreversible.
What’s the oil painting version of the Q-tip test?
The Q-tip test uses a damp (not dripping) cotton swab with distilled water and gently rolls it over a small inconspicuous area of the painting. If colour from the painting is found on the swab, the paint is unstable and the painting should be handled by a professional conservator before any cleaning work is undertaken. If only grey or brown dirt is seen, then the surface might be able to be wet cleaned very carefully.
What do professional conservators use to clean oil paintings?
Specialised solvents are used for the specific varnish and paint medium of each individual painting, pH-balanced cleaning solutions, micro-brushes and precision tools such as controlled suction devices are used by professional conservators. They evaluate the condition of all layers prior to choosing any product or technique, and they record everything that has happened.
When is it a good idea to have an oil painting professionally cleaned?
No set time frame. If a painting is kept in a stable environment, away from smoke and with a low level of dust exposure, it might only require professional care every few decades. If a painting is in a room with a lot of people using the space, or near a fireplace or a kitchen, it may gather dust more quickly and require cleaning sooner. The decision is based on condition, not calendar.
Can saliva be used on an oil painting?
Saliva has long been used by professional conservators to clean light surface dirt on stable, varnished oil paintings. The enzyme amylase in saliva can slightly better break down organic matter than distilled water alone. It is suitable only for extremely light dirt on a stable, varnished surface, and should be applied using the “roll not rub” cotton swab method. It is not a substitute for professional cleaning.