One of the most affordable and long-lasting methods of restoring and protecting a pool surface is to paint a swimming pool using epoxy paint. A two-part epoxy coating, when properly used, forms a hard, non-porous finish that is resistant to pool chemicals, UV rays, and abrasion that lasts up to 10 years. It is a painstaking and well-planned process, but it is not out of the reach of a dedicated DIY project. This manual addresses all the steps involved in draining and refilling, including the on-the-job specifics to get the job right the first time.
Key Takeaways
- Epoxy pool paint is a two-part system that comprises of resin and hardener that adhes to concrete, gunite, plaster, and fiberglass surfaces.
- An epoxy coating when properly applied will last 7 to 10 years, compared to acrylic (1 to 2 years) or rubber-based paint (2 to 4 years).
- The preparation of the surface (draining, cleaning, etching, and drying) is what makes the difference between the successful bonding of the coating and its failure.
- Two coats are necessary; the coats must have a minimum cure time of 24 hours before the next one can be applied.
- The final coat should not be filled with water 5 to 7 days before the final coating.
- Epoxy should be used on a fully dry surface. The most common cause of adhesion failure is moisture.
What Is Epoxy Pool Paint and Why Use It
Epoxy pool paint is a two part coating system composed of a resin (Part A) and a hardener (Part B). When the two components are combined in the right proportions, a chemical reaction initiates which forms a coating that is much harder and more resistant to chemicals than the traditional single-component paints.
Doheny Pool Supplies states that a two-coat system of high film build epoxy pool paint can be used as long as eight years and then it hardens to a non-porous, hard finish that is not affected by pool chemicals or UV rays. It is the choice of concrete, gunite, plaster and fiberglass pools because of its durability.
Epoxy and other types of pool paint:
| Paint Type | Lifespan | Best Surface | Drying Requirement |
| Epoxy | 7 to 10 years | Concrete, gunite, fiberglass | Completely dry surface |
| Rubber-based | 2 to 4 years | Concrete, plaster | Slightly damp acceptable |
| Acrylic | 1 to 2 years | Most surfaces | Damp surface acceptable |
There is one significant rule that is to be followed in all repaint projects: In case your pool was already covered with epoxy, you should use epoxy. The change in types of paint on an existing epoxy coating will lead to peeling and failure in adhesion. RAMUC Technical Support says that epoxy paint cannot be applied to a surface already painted with chlorinated rubber without first removing the old paint.
Materials and Tools You will Require
Preparations Before commencing, prepare the following:
- Draining pump that is submersible.
- Pressure washer (at least 3,200 psi)
- Trisodium phosphate (TSP) solution or other degreaser.
- Concrete pool acid wash solution.
- Paint scraper and wire brush.
- Two part epoxy pool paint (sized to your pool area)
- Epoxy compatible primer (on bare concrete or fiberglass surfaces)
- Phenolic core roller with 3/8 inch nap.
- Roller extension pole.
- Corner and edge paint brushes.
- Mechanical mixing paddle drill.
- Personal protective equipment such as respirator, goggles and gloves.
Do not use common domestic rollers. Epoxy is a solvent-based coating and needs a roller that is made of phenolic core to ensure that the roller does not break down when it is applied.
Step 1: Fill the Pool with water
Use submersible pump to drain all water. Open the hydrostatic relief valves on the floor of the pool to allow the empty shell not to rise in case the water table is high. This is especially necessary following a lot of rain or in areas where the water table is high.
Do not start to paint as soon as it is drained. Armorpoxy adds that the surface of the pool should be fully dry when applying epoxy. This can take two or three days of drying in humid or cold climates. Industrial blowers are used by some contractors during winter months to speed up the process.
Look at the weather forecast and plan this work. Doheny suggests that one should identify a time frame of at least one week when temperatures are between 50 and 90 degrees Fahrenheit and there is no rain forecasted. Epoxy used at temperatures lower than 50 degrees dries slowly and irregularly. When applied over 90 degrees, it can bubble or roller mark.
Step 2: Surface Preparation
The most crucial part of the whole process is surface preparation. Oils, chalky residue, algae or loose paint left on the pool surface will not allow the epoxy to bond properly and the coating will fail in a few months.
Follow this sequence:
Scrape and pressure wash. Use a scraper to remove any loose or peeling paint. Then power wash the entire pool with a minimum pressure washer of 3,200 psi to remove paint chips, algae and surface debris.
Wash with TSP or degreaser. Spray with a garden sprayer with trisodium phosphate solution. Wipe down the whole surface, being careful of the waterline, steps and points where oils and sunscreen build up. Wash with a strong jet of water, at least three times, by a garden hose. The pressure washer should not be used in rinsing since it does not have the capacity to wash away the chemical residue.
Concrete pool acid wash. The concrete and gunite pools are an advantage of acid wash as it opens the pores of the surface and gives a mechanical bond to the epoxy. Add the acid wash solution, leave to foam and react then thoroughly rinse with clean water.
Test for residue. Spray water on the dry surface. Oils or contaminants are still available, in case the water beads up. Keep cleaning until the water is evenly spread across the surface without beads.
Mend fissures and holes. Seal any cracks or damaged parts with suitable patching compound and leave to dry before continuing. Do not repaint damaged areas that are not repaired.
Step 3: Add Primer where necessary
A primer coat is not necessary on all pool surfaces but there are a number of situations where it is required.
Concrete and gunite pools have the advantage of having a primer coat that closes the pores and gives the epoxy a more solid mechanical foundation. Primer that is specifically designed to be used on fiberglass should be applied to fiberglass pools in order to avoid blistering and delamination. When repainting old epoxy that is in good condition, you can skip the primer, although you should check with the instructions of the paint manufacturer.
Roll the primer with a phenolic core roller, starting with the deep end and moving to the shallow end. Let the primer dry during the entire period stated by the manufacturer prior to applying the initial layer of epoxy, which is usually 24 hours.
Step 4: Epoxy Paint is mixed
Two-part epoxy paint must be mixed accurately and carefully and then applied. One of the most frequent causes of a premature failure of a coating is incorrect mixing.
Follow this procedure:
- Add Part A (resin) to Part B (initially) and stir the mixture with a mechanical mixer or drill paddle (approximately five minutes).
- Stir Part B (hardener) alone, about five minutes.
- Add Part B to Part A. Do not invert.
- Blend the mixture thoroughly at least 15 minutes, scraping sides and bottom of container to make sure everything is mixed.
- Let the mixed paint rest 20-45 minutes before application (this is known as the induction period and is needed to allow the chemical reaction to start correctly).
As per RAMUC, the pot life of mixed epoxy pool paint is about three hours at 70 degrees Fahrenheit. Only combine the amount that you can use in that window. When you have more than one kit, mix them in one container to have the same color throughout the pool.
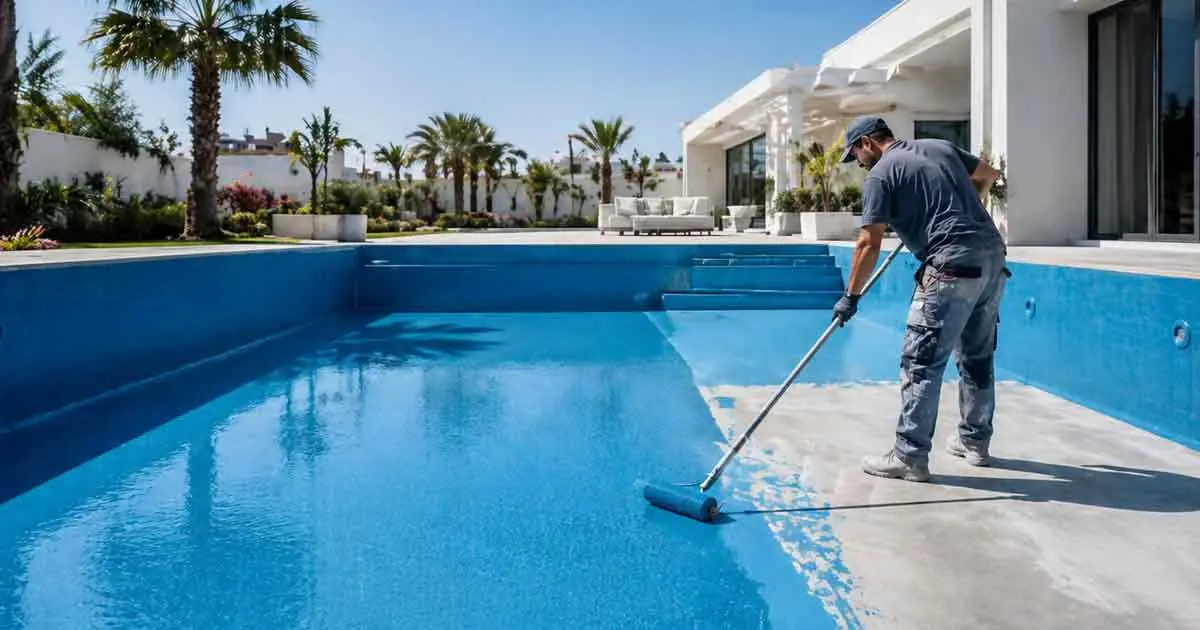
Step 5: First Coat
Start to paint at the deep end and move to the shallow end. This will make sure that you are not stepping over newly applied paint.
Your phenolic core roller with the extension pole will access the walls of the pool. Cut in corners, steps, and edges that cannot be reached cleanly by the roller using a brush. Use uniform pressure all around and have a consistent rate of coverage.
It is best not to paint in the direct sunlight. Armorpoxy points out that direct sun may result in epoxy curing too fast resulting in bubbles and roller marks on the final surface.
The first coat should be left to dry completely of 24 hours before applying the second coat. Do not hurry this step. Another mistake that is frequently and expensively made is applying the second coat before the first one is dry.
Step 6: Second Coat
Put on the second coat in the same way as the first, starting at the deep end. The second layer is added to add thickness and cover the surface entirely giving the entire chemical and UV protection that epoxy pool paint is renowned.
Two coats are not a choice. One layer of epoxy will not provide the durability that the product is rated to.
Step 7: Before Refilling Cure Time
Patience is most crucial at this stage. Although the paint may be dry to the touch, epoxy still requires several days to dry chemically.
After 24 to 48 hours, light foot traffic can be resumed, but until the coating has dried at least 5 to 7 days, depending upon temperature and humidity, no water should be poured into the pool. During the cooler or damper climates, take the entire 7 days.
Check the whole surface before filling up, to see whether it has thin spots, or missed areas, or damage. Paint over any such places and leave to dry before adding water. When you start filling, fill gradually and look at the newly coated surface to detect any weak spots or leaks.
Errors to be avoided
Applying paint on a wet surface. Epoxy must have a pool that is totally dry. Any traces of moisture under the coating will result in bubbles and loss of adhesion.
Skipping surface etching. The epoxy does not have anything to hold on to without acid washing or mechanical roughening. The coating will be peeled in a season.
Mixing incorrectly. Undermixed or mixed in the incorrect proportion epoxy will not cure and will be soft or sticky.
Changing paint types. Using epoxy on top of chlorinated rubber or acrylic paint without complete removal of the old paint will result in failure of the new coating. Always determine the type of paint that is available before buying a new one.
Ignoring pot life. Mixed epoxy has a small working window. Paint with a life span that has surpassed its pot life will not flow or level properly and will give a roughness and uneven finish.
Epoxy Pool Paint Life span
A two-coat epoxy system when well prepared and applied can last 7-10 years. This number is reinforced by various manufacturers such as Armorpoxy, RAMUC and Dohenys who claim a 7-8 year rating of their products in normal pool conditions.
The longevity of the water chip is determined by a number of factors: the balance of the water chemistry, the number of times used, climate conditions, and the presence of small chips or cracks that are fixed in time before the water penetrates the coating. An epoxy finish is much more durable than any other available pool paint.
Initial investment in proper preparation and quality materials is hefty, yet the cost per year of epoxy is well below the alternatives. Paint of acrylic type, at about one to two years of service, or paint of rubber type, at two to four years, demands much more frequent recoating. Epoxy, which is used correctly once, is the most cost-efficient in the long run.
Selecting the correct Epoxy Pool Paint
There are a number of well-known manufacturers of two-part epoxy pool paint, such as RAMUC, Doheny’s, ArmorPoxy, INSL-X and In The Swim. In choosing a product, take into account the following:
- Surface compatibility. Ensure that the product is rated in your pool surface type.
- UV resistance. UV stabilizers are in all quality epoxy pool paint, but verify product specifications.
- Coverage rate. Determine the surface area of your pool and make sure you have the number of kits needed.
- Pot life. Longer pot life is more convenient to deal with, especially with larger pools.
- Primer requirement. There are those that are self-priming; others that need a primer coat.
The fine art practice of selecting materials with attention to the nature of a surface and situation is reflected in the approach, as in fine art, the medium/surface relationship is central to the result. This concept of conscious material choice is addressed in another way in the work on the Shani Levni main page, where the medium used is in itself a statement of art.
Maintenance After Painting
Routine maintenance will add much life to the epoxy coating once the pool is filled and in use.
Equilibrium water chemistry. Among the main reasons behind premature coating breakdown, there are high chlorine levels and pH imbalance. Monitor test water chemistry at least once in every week and once in every three weeks on swimming season.
Wipe the surface of the pool with a soft brush. Do not use rough implements that cut the epoxy film. Check the surface at the beginning of each season whether there are chips or wear and tear and repair it immediately using a matching touch-up product before it extends.
The principle of maintaining the integrity of a surface by careful, continuous attention to material condition is one that is applicable to the maintenance of pools as well as to the conservation of painted works. Caution necessary to keep an epoxy finish alive is not dissimilar to the preservation mindset of conserving artistic surfaces – a mindset that can be identified with the work discussed in the Shani Levni exhibitions guide.
Conclusion
Epoxy painting a swimming pool is an undertaking that pays off both in terms of preparation and patience. The outcome is more determined by the surface work of draining, cleaning, etching and drying than any other form. Its use is simple when the surface is properly prepared and the product is mixed.
When the process is done properly, the outcome will be a pool surface which will last up to a decade before it needs to be attended to once more. The fact that epoxy is the cheapest pool paint that can be used and the fact that the finish it leaves is non-porous makes it easier to maintain as long as it is in service.
Whether to start with the right materials and enough time allocated to follow through with every stage in the right way is the main choice that anybody who may be planning this project has to make. The paint itself is trustworthy. The procedure is established. It depends on the care that is taken of the work.
To find more home improvement, lifestyle, and creative thinking guides, visit the entire spectrum of content at Shani Levni.
Frequently Asked Questions
On which surfaces can epoxy pool paint be used?
Epoxy pool paint can be applied to concrete, gunite, plaster, and fiberglass pools. It is also the right option to use in pools that are already painted using epoxy. It cannot be used on chlorinated rubber or acrylic paint without complete remover of the existing paint.
What is the time required to fill epoxy pool paint?
At least 5 to 7 days after the last coat has been applied, the pool should not be filled. The epoxy is chemically cured over several days although the surface can be dry in 24 to 48 hours. Early filling is dangerous as it may spoil the finish before it becomes hard.
Should I prime before putting on epoxy pool paint?
It is dependent on the surface. Fiberglass pools must never be given an incompatible primer. Primer coat is advantageous in concrete and gunite pools. When repainting over solid existing epoxy, primer might not be necessary, but refer to the product instructions.
Will I be able to paint a pool myself or shall I engage a professional?
Epoxy painting a swimming pool is a task that a prudent DIY-er can accomplish. It is time-consuming and involves preparation, mixing, and cure time, but does not demand special contractor skills. The primary risks are associated with the haste of the preparation or cure phases.
What is the amount of epoxy pool paint required?
Divide the area of your pool walls and floor in square feet, and compare it with the coverage rate of the paint product. The average two part epoxy pool paint is between 200 and 400 square feet of coverage per gallon per coat. Two coats are necessary, and make a plan.
How frequently do you have to re-apply epoxy pool paint?
Two coats of epoxy can last between 7 and 10 years with normal conditions. It might need to be reapplied earlier in case of high usage of the pool, a significant imbalance of chemicals or physical damage to the coating surface.
What is the ideal temperature to apply epoxy pool paint?
The optimal temperature range is 50 to 90 degrees Fahrenheit. The epoxy does not cure fast enough or evenly below 50 degrees. It cures too fast above 90 degrees and results in bubbles and surface defects. The humidity must be average because excess humidity can influence the ultimate cure.