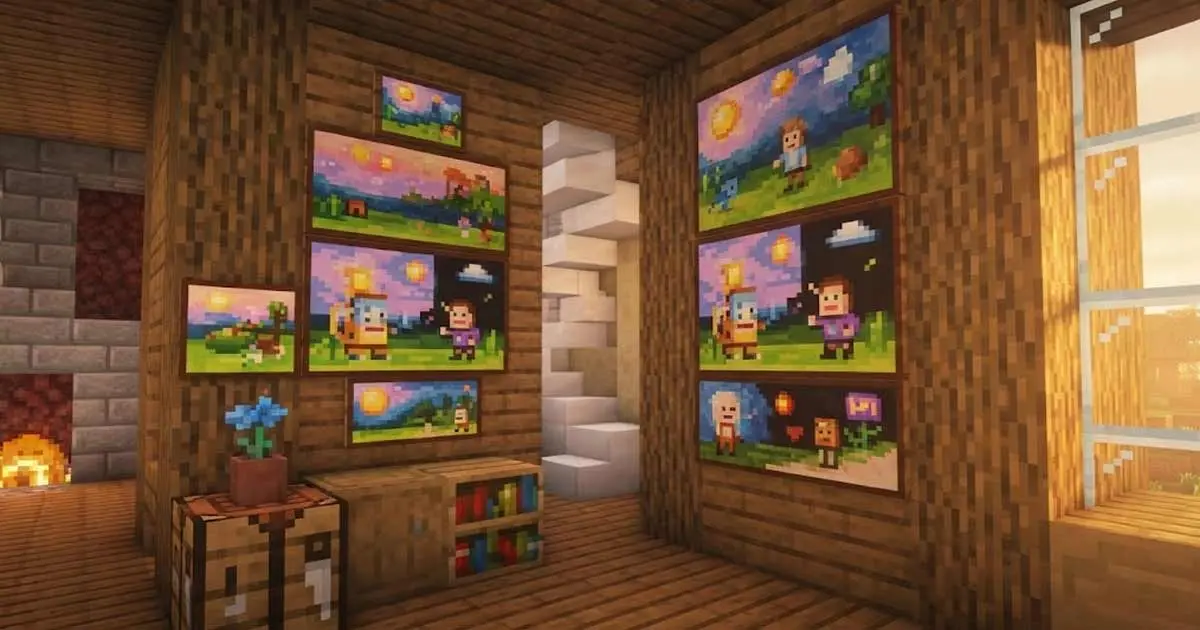
Retexturing Minecraft paintings 16×16 is a process of changing the PNG image files that Minecraft uses to draw wall paintings with new images of your own creation at 16×16 resolution. It’s very simple: make a resource pack folder with the right structure, upload your 16×16 PNG file to the paintings subfolder with the same original name, package it into a zip file and enable it in-game. No mods, no Java coding and no special software other than a pixel art editor is needed. This is a guide for the full process, including Bedrock Edition and Java Edition, and includes instructions for 16×16 paintings.
Key Takeaways
- The 16×16 paintings (like kebab.png and aztec.png) are PNG images that exist in the resource pack in the folder: textures/painting/ and can be changed to any custom image of the same size.
- Java Edition: Paintings are stored individually as pngs (Java 1.21 onwards): kebab.png (16×16), aztec.png (16×16), alban.png (16×16), aztec2.png (16×16), bomb.png (16×16), plant.png (16×16).
- In Bedrock Edition, older paintings (before 1.21) are saved as coordinates in one sprite sheet, kz.png, while newer paintings are saved in individual files.
- The only tool needed for a basic 16×16 retexture is a pixel art editor, such as GIMP (free), Aseprite ($19.99), or the browser-based resourcepackcreator.com (free, no install).
- CyPaint states that only existing paintings can be replaced in a resource pack, Minecraft does not support adding new painting ID’s without mods. Do not make any changes to the original dimensions to prevent distortion.
- The pack needs to contain a pack.mcmeta (Java) or manifest.json (Bedrock) file in addition to the textures folder in order to be recognized by the game.
- A resource pack is a finished product that is delivered as a .zip (Java) or .mcpack (Bedrock) file, which you can put in the resourcepacks folder and enable in-game via Options → Resource Packs.
Understanding Minecraft Painting Dimensions
Minecraft paintings are available in a variety of sizes and the 16×16 pixel size is a specific set of paintings that take up 1×1 space on the wall. When beginning a retexture project, it is helpful to understand the size of the painting being retextured, as well as the size of the 16×16 paintings.
CyPaint’s resource pack guide says that the size of each painting file varies between different paintings. For instance, kebab.png is 16×16 pixels and pool.png is 32×16 pixels. Match the dimensions of the file you are replacing with the original file so that the painting appears in-game.
16×16 Painting Files in Java Edition
The following paintings take up 1×1 blocks and are 16×16 pixels in PNG format:
| File Name | In-Game Name | Dimensions |
| kebab.png | Kebab | 16×16 |
| aztec.png | Aztec | 16×16 |
| alban.png | Alban | 16×16 |
| aztec2.png | Aztec2 | 16×16 |
| bomb.png | Bomb | 16×16 |
| plant.png | Plant | 16×16 |
| wasteland.png | Wasteland | 16×16 |
The 7 paintings that can be swapped out for custom 16×16 artwork. Larger paintings, like skull_and_roses.png (32×32) or wither.png (64×32), are of a different size and can’t be replaced with a 16×16 image without visual distortion.
How Bedrock Edition Handles Paintings
In Bedrock Edition, paintings prior to version 1.21 have been loaded as coordinates on a single large image called kz.png instead of as files. The Microsoft Learn documentation for Minecraft Bedrock says that older paintings (paintings created prior to v1.21.00) are saved as coordinates in a single large painting (kz.png) within the public repository.
If you are retexturing a painting that is part of an older Bedrock project, you need to edit the part of kz.png that contains the painting you are retexturing, while keeping the size of the sprite sheet the same. In newer Bedrock paintings (v1.21.00 and later) each PNG is used, as is the approach in Java Edition.
Tools You Need for a 16×16 Painting Retexture
An image of 16×16 pixels needs tools that will allow pixel level editing but not automatically smooth or anti-alias the image, which will cause the sharp edges of the pixel art to be lost.
Free Options
GIMP: Open source image editor that supports PNG images of any size. To work at 16×16, zoom in to 800% or more to see individual pixels. Turn off anti-aliasing when using the pencil tool. GIMP can be downloaded from gimp.org.
No install necessary free Minecraft texture editor: resourcepackcreator.com. The site’s description says that it is a pixel-perfect painting tool for any vanilla block, item, GUI element or mob with layers, mirror and an editable palette, and painting in real-time. It is compatible with both Java and Bedrock editions and allows for painting retexture.
Paint.NET: A free image editor for Windows that supports layers, which is great for pixel art editing when using zoom. Before painting at the pixel level, turn off anti-aliasing, as with GIMP.
Paid Options
Aseprite ($19.99): A dedicated pixel art editor that includes animation support, palette management, and pixel-level editing tools, making it popular among Minecraft texture creators. It has an interface built around sprite/pixel art work and is faster than adapting a general purpose editor. Available at aseprite.org.
Adobe Photoshop: Pixel art can be done using the pencil tool, which has a hardness of 1px and is not anti-aliased, but for this use case it is too expensive in relation to other free tools.
Step-by-Step: Creating a 16×16 Painting Retexture for Java Edition
In this step, you create the structure of the Resource Pack folder.The first step is to create the structure of the Resource Pack folder.
Make a new folder on your computer (MyCustomPaintings). Within this folder, make the following structure:
MyCustomPaintings/
├── pack.mcmeta
└── assets/
└── minecraft/
└── textures/
└── painting/
All subfolders should be called as stated. If the name of any folder is misspelled or the capitalization is wrong, the game will not recognize the pack.
Step 2: Create the pack.mcmeta File
The pack.mcmeta file contains information about how to interpret your resource pack. In the subfolder MyCustomPaintings (not in any subfolder), make a plain text file called pack.mcmeta. Copy and paste the following text into it:
{
“pack”: {
“pack_format”: 34,
“The description” is a collection of custom 16×16 paintings.
}
}
To adjust the textures, you need to create two more files after you have done it, according to 4netplayers.com’s resource pack guide. The pack_format number should be the same as the version of Java Edition you are using. The pack_format for Minecraft 1.21.x is 34. Check the Minecraft Wiki’s resource pack format table for other versions.
The Generalist Programmer’s 2026 resource pack guide says that Bedrock Edition uses manifest.json, and Java Edition uses pack.mcmeta. Be sure to use the right file for your edition.
Step 3: Make Your 16×16 Artwork
Open up your pixel editor and make a new canvas that’s 16×16.Open up your pixel art editor and make a new canvas 16×16. Don’t work at a higher resolution and then scale it down, because anti-aliasing causes the sharp edges of pixels that Minecraft draws to become fuzzy.
Create your new painting in this 16×16 grid. One unit of color is represented by each pixel. The 16×16 canvas provides you with 256 pixels, a huge creative restriction. It’s a very interesting exercise to work within it in terms of visual economy: every pixel has to be visually significant, due to the limited number of pixels.
The default size of Minecraft textures is 16×16 pixels, according to 4netplayers.com. While it’s not a lot of room, it can stimulate creativity. It is best to NOT alter the actual image size. Create within the parameters and trace over the original file.
If you want to get the original file as a reference, extract it from Minecraft’s jar file. Go to the folder where you installed Minecraft and open the folder Minecraft/versions/ and go to the version jar file (e.g. 1.21.jar) then open it as a zip file. The painting files are stored in the assets/minecraft/textures/painting/ folder.
Step 4: Save the File with the Correct Name
Save your 16×16 artwork as a PNG image. Give it the same name as the original painting file you are replacing. For instance, if the Kebab painting is being replaced, the file name should be kebab.png. If replacing Aztec, save it as aztec.png.
CyPaint recommends always checking to see if the file names are the same as the in-game painting IDs. If these files are mistaken for other files, the game may be replaced or have errors. Avoid changing the name of the original files, they must be the same as the game’s name (lower case letters included).
Copy the saved PNG file to the painting folder that you created:
MyCustomPaintings/assets/minecraft/textures/painting/kebab.png
Step 5: Package the Resource Pack as a ZIP File
Click on the pack.mcmeta file and the assets folder (not the folder MyCustomPaintings). Right click and compress them into a .zip file. Change the name of the zip to whatever you want (e.g. MyCustomPaintings.zip).
The pack.mcmeta file and the assets/ folder should be at the root of the .zip file. Note: If you zip the outer MyCustomPaintings folder instead of its contents, Minecraft will not know what pack it is.
Step 6: Install the Resource Pack and activate it
Go to your .minecraft folder (Windows: %appdata%.minecraft, Mac: ~/Library/Application Support/minecraft). Locate the resourcepacks folder and drop your MyCustomPaintings.zip file into it.
Open Minecraft: Java Edition. Go to Options → Resource Packs. Your new pack should be in the list of available packs. Click the arrow to drag it to the selected packs column and press Done. The game will re-load textures, and your custom paintings will be enabled.
Once the player has selected the pack, and then pressed Done, the resource pack should be active in-game, according to the Sportskeeda installation guide.
Step-by-Step: Retexturing Paintings for Bedrock Edition
The Bedrock Edition process is different in folder structure and metadata file format.
Folder Structure for Bedrock
MyCustomPaintings/
├── manifest.json
├── pack_icon.png (optional)
└── textures/
└── painting/
Note that Bedrock does not have the structure of subfolders under Assets/minecraft. The textures folder is located in the pack folder.
manifest.json for Bedrock
The Microsoft Learn documentation about Minecraft Bedrock says that you need to create a manifest.json file in the root of your resource pack with the following structure:
{
“format_version”: 2,
“header”: {
The “description”: “My custom paintings” field is the only field that contains the word “description”.
“name”: “MyCustomPaintings”,
“uuid”: “00000000-0000-0000-0000-000000000001”,
“version”: [1, 0, 0],
“min_engine_version”: [1, 21, 0]
},
“modules”: [
{
The “description”: “My custom paintings” section displays my custom paintings.
“type”: “resources”,
“uuid”: “00000000-0000-0000-0000-000000000002”,
“version”: [1, 0, 0]
}
]
}
Use real unique identifiers for the UUIDs. You can use uuidgenerator.net as a generator for UUIDs. Each manifest.json needs to have a unique UUID for the header and modules sections, according to Microsoft Learn.
Installing on Bedrock
Change the name of the folder to MyCustomPaintings.mcpack. On Windows, double click on the .mcpack file to launch Minecraft and install the pack automatically. On mobile, open the .mcpack file in the file manager and Minecraft will open up and import it automatically.
Common Mistakes and How to Avoid Them
Wrong Image Dimensions
If you change a 16×16 painting file to a file of other dimensions, the painting will not display correctly in-game, either stretched, cropped or not visible at all. When making a replacement, always verify the size of the original file. To check the original size of any painting, open the painting’s PNG file from the jar file in any image editor.
Wrong File Name
The replacement file must be the same name as the original (lowercase). The kebab.png (capital K) will not fit where kebab.png is expected. CyPaint advises to always check if file names are identical to the in-game painting IDs.
Editing the Game’s Jar File Directly
One of the most common beginner’s mistakes is attempting to edit the painting files directly within the Minecraft jar. The Minecraft Forum community advises you not to directly edit the painting file within the jar. You will have to save your edited painting in a new custom resource pack. Modifying the jar directly could corrupt the game files and any changes are lost whenever Minecraft gets updated.
Wrong Pack Format Number
The version of Minecraft you are using has to be the same as the pack_format number in pack.mcmeta. If the pack_format is wrong, then the game will mark the pack as incompatible. Use the number from the pack format table on the Minecraft Wiki for your version.
Creating New Painting IDs (without mods)
CyPaint claims that painting may only be replaced in a resource pack. It is not possible to add new painting IDs into Minecraft without mods. If you wish to add completely new paintings, a data pack (Java Edition 1.21+) or a mod (Fabric or Forge) will be required. Resource pack only replaces the existing resource pack.
Adding Custom Paintings with Data Packs (Java 1.21+)
If you are not looking to replace existing paintings, but rather add new ones, the Java Edition of Minecraft 1.21 added the option to add custom painting variants using a combination of data pack and resource pack. The Minecraft Wiki’s tutorial on adding custom paintings says that a data pack declares a new painting variant with a specific width and height, and the resource pack contains the texture file for the variant.
The data pack structure needs a painting_variant file in the data/[namespace]/painting_variant/ folder:
{
“asset_id”: “mycustompack:my_painting”,
“author”: “Your Name”,
“title”: “My Painting”,
“height”: 1,
“width”: 1
}
The resource pack then includes the matching PNG texture at textures/painting/my_painting.png for a 1×1 block painting.
The Minecraft Wiki says that this will enable new painting variants, which can be randomly placed or obtained via the item found in the Creative Menu. Unlike most resource pack changes, changes to the data pack file will only take effect after leaving and reentering the world.
Pixel Art Tips for 16×16 Painting Design
Creating successful artwork at 16×16 is much different from working at higher resolutions. With 256 pixels, decisions have to be made that higher resolution work would not require.
Stick to a limited colour palette. The most common type of pixel art is small sprites (16×16) that use 4 to 8 colors. The more colors, the more visual noise, which makes it hard to read at small size. This is why the original Minecraft paintings have very limited palettes.
Think in silhouette. The outer shape of the subject must be immediately readable, since there is no space for detail which explains an unclear form. Before scaling up to edit your design, test your design by zooming to 100% to see how it will look in game.
Avoid anti-aliasing. Anti-aliasing creates pixels that are translucent at the edges, which are smooth at medium zoom but muddy at game zoom. Only work in full opacity.
Use the same textures as in Minecraft. The original Minecraft painting textures show just how detailed and simple the palette is, and how well it works in the game engine. It is a good idea to study the images of kebab.png and aztec.png at full zoom before designing your replacement.
Creating art within the very limited constraints of a 16×16 pixel grid is similar to the fine art tradition of creating art within very limited constraints. There is a creative pressure that can’t be matched by the absence of constraint. This is the principle that is central to the analysis in the guide to Ad Reinhardt Abstract Painting 1957, in which he gives extreme self-imposed restrictions in oil painting and produces works of extreme precision and focus, a philosophy that hits the nail right on the head for the demands of pixel art at its smallest scale.
HD Painting Retextures: Going Beyond 16×16
This guide is for 16×16 painting retextures, but if you want to have more detailed painting designs, you can have higher resolution textures for Minecraft.
To create an HD pack, add each texture to a higher square, power-of-two size (32×32, 64×64, 128×128, 256×256) with the same file name and path as the original pack. Minecraft supports any resolution which is square.
That is, if you want to change a 16×16 painting for a 32×32, 64×64 or 128×128 PNG of the same name, Minecraft will scale the image down to fit the size of the painting. The benefit is that there is more detail in the source file. The downside of this is that the paintings in game are relatively small and the additional detail will only show if the player zooms really close to the painting.
A 32×32 source file is a good compromise for a 1×1 block painting, as it allows for more detail than a 16×16 file, but doesn’t necessitate a full HD texture pack approach.
Where to Share and Download Custom Painting Packs
Several platforms offer and distribute community-made packs if you create a custom 16×16 painting resource pack:
- Planet Minecraft (planetminecraft.com): The biggest community resource pack library. Packs are uploaded as zips containing screenshots and descriptions.
- CurseForge (curseforge.com): A significant distribution platform for resource packs, especially for Java Edition.
- Modrinth (modrinth.com): A newer platform with a clean interface, becoming more popular for Java Edition resource packs.
- The browser-based editor enables direct download and community sharing of created packs, through resourcepackcreator.com.
If you are downloading any custom painting pack from these sites, make sure that the pack format number is compatible with your version of Minecraft otherwise you may receive a warning about the pack.
Minecraft Painting Retexture Quick Reference
| Task | Details |
| 16×16 painting file location (Java) | assets/minecraft/textures/painting/ |
| 16×16 paintings available | kebab, aztec, alban, aztec2, bomb, plant, wasteland |
| Required metadata file (Java) | pack.mcmeta |
| Required metadata file (Bedrock) | manifest.json |
| Old Bedrock sprite sheet | kz.png (pre-v1.21) |
| Recommended free tools | GIMP, resourcepackcreator.com |
| Paid tool | Aseprite ($19.99) |
| Pack format (Minecraft 1.21.x) | 34 |
| Distribution format (Java) | .zip |
| Distribution format (Bedrock) | .mcpack |
| Can add new painting IDs without mods? | No (requires data pack in Java 1.21+) |
Conclusion
One of the easiest ways to get started with creating a Minecraft resource pack is to retexture Minecraft paintings at 16×16. It doesn’t involve any programming knowledge, mods or any tools except a free pixel art editor and a text editor. The technical requirement is simply the creation of the resource pack folder structure, saving your custom PNG with the proper name, adding a pack.mcmeta file and zipping the result.
The interesting part is the creative challenge! 16×16 is a challenge that requires a high level of visual economy, meaning that you’ll need to master the art of conveying a familiar image in the fewest possible pixels. The seven 16×16 paintings in Minecraft’s default set each solve that problem in a different way, and if you change any of them with your own design, you don’t need to destroy the readability of the image at the level of pixels that makes it work in the game engine.
Learn more about creative projects, digital art and game customization at Shani Levni.
Frequently Asked Questions
How do I retexture a 16×16 painting in Minecraft?
Make a folder called resource pack that contains a folder called textures/painting/. Drop your custom 16×16 PNG image into the painting folder, under the same name as the original (e.g., kebab.png). Place a pack.mcmeta file in the root of the pack. Compress it as a zip file, and put it in your .minecraft/resourcepacks folder; then, activate it in-game from Options → Resource Packs.
Which of the following Minecraft paintings is 16×16?
In Java Edition, there are 16×16 paintings: kebab.png, aztec.png, alban.png, aztec2.png, bomb.png, plant.png, and wasteland.png. These are the paintings which take up a space of 1×1 block on the wall. For larger paintings, different dimensions are used, and replacement files of those dimensions are needed.
Can I add new paintings to Minecraft without mods?
For Java Edition 1.21 and above, it is possible to add new painting variants with a data pack (where you register the new painting ID) and a resource pack (where you add the texture). Previously, and in Bedrock Edition, existing paintings can only be replaced within a resource pack. In vanilla Minecraft, it is not possible to add new painting IDs without using a mod.
What format should my custom painting be in?
Custom Minecraft painting textures should be PNG files that include transparency (PNG-32 or PNG-24). The size should be the same as the original file you are replacing. For 16×16 paintings, save as a 16×16 PNG. The painting will not appear correctly or at all if you use any other format other than JPEG or BMP.
What is pack.mcmeta and do I need it?
The pack.mcmeta file is a mandatory JSON metadata file that provides information to Minecraft on how to interpret your resource pack. If it is not there, Minecraft won’t recognize the folder as a valid resource pack. It must be located in the root of the resource pack folder (not in any subfolder) and must have a valid pack_format number that matches your game version.
Can I use a 32×32 image to replace a 16×16 painting?
Yes. Minecraft can accept higher resolutions of textures as long as they are square and have power of two dimensions (32×32, 64×64, 128×128, 256×256). A 32×32 image can be used for a 16×16 painting to give more detail in the source file. The game will resize the image to fit the in-game painting size, so the extra resolution will be somewhat lost at normal playing distance, but will become visible when the player is very close to the painting.
How do I install the resource pack zip file so that it is activated?
Copy the zip file to the resourcepacks folder of your .minecraft folder. The path is %appdata%.minecraft\resourcepacks on Windows. On macOS, it’s located in ~/Library/Application Support/minecraft/resourcepacks. Once placed there, open Minecraft, click Options → Resource Packs and choose the pack from the list of available packs.