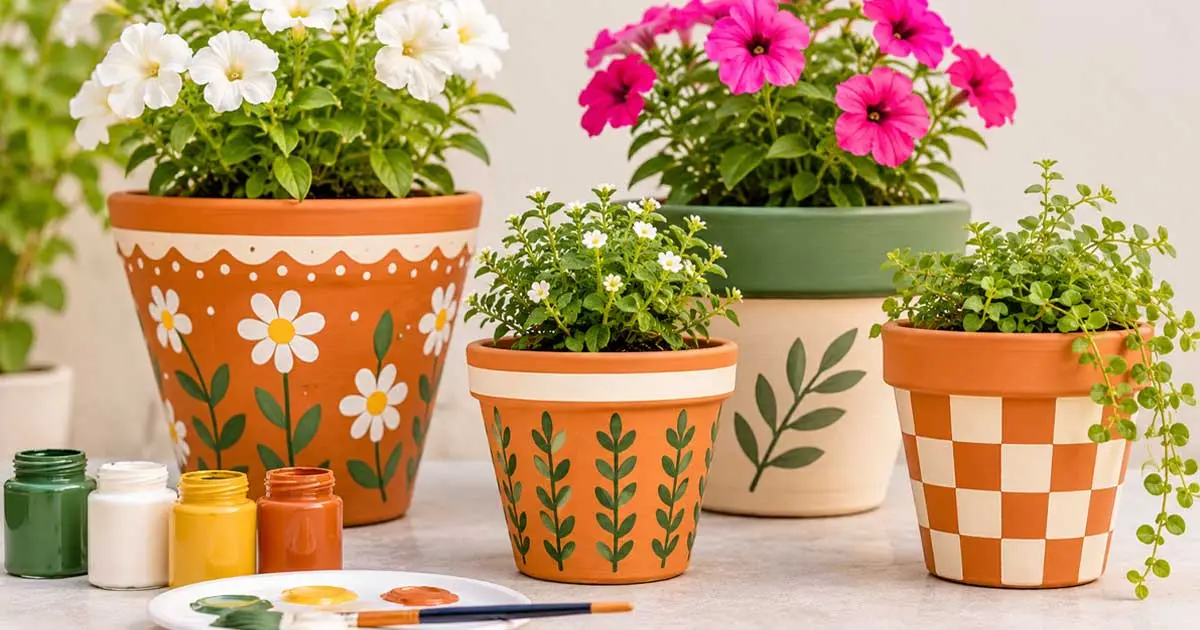
To paint a terra cotta plant pot, scrub it clean, remove any white mineral deposits, and let it dry for at least 24 hours. Apply a primer or sealer, then two or three thin coats of acrylic or spray paint, and finish outdoor pots with a clear exterior acrylic sealer. Terra cotta is porous, so water moving through the clay can lift paint from behind. Decide early whether the pot will hold a living plant, because that affects whether and how you seal the inside.
Key Takeaways
- Scrub the pot clean, remove white mineral deposits, and let it dry at least 24 hours. Terra cotta holds moisture deep inside even when it feels dry.
- Apply two or three thin coats of acrylic or spray paint, and finish outdoor pots with a clear exterior acrylic sealer.
- Sources disagree on sealing the inside of pots that hold living plants. Sealing helps prevent peeling, but it reduces the clay’s breathability.
- Never block the drainage hole.
- Spray paint outdoors in thin coats, and plan to check and refresh the sealer on pots left outside.
Why Terra Cotta Needs Special Preparation
Terra cotta is fired clay with a porous wall. That porosity is what makes it good for plants, since it lets air and moisture pass through. It is also what makes it hard to paint.
Two problems cause most failures.
Moisture moving outward. When a pot is watered, moisture migrates through the clay. According to Potteryix, a sealed exterior can trap that moisture behind the paint, and the resulting pressure can cause blisters and peeling.
Mineral salts. Used pots often show a white, chalky crust called efflorescence. Garvillo warns that painting over these deposits makes the finish flake.
Most guidance follows from these two facts. Clean thoroughly, dry completely, and choose a sealing approach on purpose.
What You Need
- Terra cotta pots
- Stiff brush and mild dish soap, or a mild vinegar and water solution
- Fine sandpaper for stubborn deposits
- Primer or terra cotta sealer
- Acrylic craft paint or spray paint
- Clear acrylic sealer rated for outdoor use if the pot will stay outside
- Foam brushes, painter’s tape, and cardboard
- Gloves and a face mask when spraying
Step-by-Step: Painting Terra Cotta Plant Pots
- Scrub the pot. Use warm soapy water and a stiff brush. A mild vinegar and water mix can help with salt deposits, according to Journeyman HQ. Sand off stubborn white crust.
- Rinse and dry for at least 24 hours. Several sources advise 24 to 48 hours. Journeyman HQ notes that terra cotta holds moisture deep in its pores even when it feels dry, and painting too soon can make paint bubble.
- Test for dryness. The base should feel dry and cool to the touch, not damp.
- Prime or seal. For outdoor pots or pots holding plants, apply a terra cotta sealer or exterior primer in a thin coat. Indoor decorative pots can often take paint directly, though a primer smooths light colors.
- Paint in thin coats. Apply two or three thin coats and let each dry fully. Light colors need extra coats to cover the orange clay.
- Paint the rim and base. With spray paint, let the outside dry, then turn the pot over to cover the bottom edge and underside of the rim.
- Let the paint cure. Chalkola suggests waiting 24 hours before sealing.
- Seal the paint. Outdoor pots need two coats of clear exterior acrylic sealer. Chalkola suggests re-sealing outdoor pots about every six months.
Should You Seal the Inside of the Pot?
This is where sources disagree, and the honest answer depends on how the pot will be used.
| Position | Reasoning | Sources |
|---|---|---|
| Seal the inside | Water migrating through the wall lifts the paint, and an interior seal stops it | Potteryix, Blooming Expert, Feeling Nifty |
| Leave the inside unsealed | The clay needs to breathe and drain, and breathability is a reason to use terra cotta | Gardening Beyond, The Graphics Fairy |
Here is a practical way to decide.
- Decorative pots, or pots with artificial plants. Seal inside and out. Breathability does not matter, and the seal protects the paint.
- Pots with living plants. Choose between two paths. You can seal the inside with a non-toxic terra cotta sealer and accept reduced breathability, or keep the pot unpainted inside and use it as a cover for a plastic grow pot. The second option is our own suggestion, since sources do not agree on a single fix.
- Never paint the inside with ordinary craft paint. Chalkola advises sealing the inside with a non-toxic terra cotta sealer instead.
- Never block the drainage hole.
Brush-On Acrylic or Spray Paint?
Both work. Your choice depends on the look and the speed you want.
| Method | Best for | Notes |
|---|---|---|
| Acrylic and brush | Detail, patterns, small projects | Thin coats, with two to three layers for even color |
| Spray paint | Solid colors and quick coverage | Thin coats, with the can held 8 to 12 inches away |
| Paint pens | Fine lines and lettering | Best on a sealed or primed surface |
Garvillo recommends holding the spray can 8 to 12 inches from the pot and starting and stopping the spray off the edge. The technique matches our guide on painting pumpkins with spray paint, which covers thin coats, drying times, and aerosol safety in more detail.
Spray outdoors. The U.S. Consumer Product Safety Commission’s Art and Craft Safety Guide advises using aerosol paints outdoors or with a fume booth when possible. Keep cans away from flame and wear a mask.
Choosing Paint, Primer, and Sealer
| Product | Use | Note |
|---|---|---|
| Acrylic craft paint | Indoor pots and decorative designs | Thin it slightly for even coverage |
| Exterior acrylic paint | Outdoor pots | Made for UV and moisture exposure |
| Spray paint and primer in one | Fast solid colors | Check that the label lists terra cotta or porous surfaces |
| Terra cotta sealer | Prep coat inside and out | Look for water-based, non-toxic formulas for pots with plants |
| Clear acrylic spray sealer | Final coat | Use an exterior-rated product for outdoor pots |
Chalk paint is another option, and Gardening Beyond notes that it can often skip primer if sealed with wax or a matte sealer. Avoid oil-based paint, which may not adhere well, according to one guide.
Design Ideas
- A solid color set. Paint several pots in one color family for a clean look.
- Dipped rims. Mask the pot with painter’s tape and paint only the top or bottom band.
- Painted patterns. Use acrylic paint or paint pens over a white base coat.
- Terra cotta looks. Textured terra cotta paint can give a raw clay look on other surfaces.
- Stripes and dots. Simple geometric shapes are forgiving and look intentional.
Common Problems and Fixes
| Problem | Likely cause | Fix |
|---|---|---|
| Paint peels or blisters from behind | Moisture moving through the clay | Seal the interior and prime the exterior |
| Bubbles within days | The pot was painted while damp | Dry 24 to 48 hours before painting |
| White crust pushes paint off | Efflorescence was not removed | Scrub and sand before painting |
| Drips and runs | Coats too thick | Use thin, even coats |
| Color fades outdoors | No UV protection | Add exterior clear sealer and re-seal regularly |
| Tacky finish | Not enough drying time | Allow each coat to dry fully |
Caring for Painted Pots
Check painted pots after heavy rain and at the change of seasons. Look for chips, peeling edges, or a chalky surface, which means the sealer is wearing thin. Touch up small chips with matching paint, then add a coat of sealer. Do not leave water standing in a saucer, because it keeps the clay damp.
Painted pots are also fragile and easy to scratch. If you move house, wrap each pot in a soft layer and cushion it in a box. Our guide on how to pack artwork for moving covers wrapping and padding methods that also suit decorative pieces.
Conclusion
Painting terra cotta plant pots is simple, but the clay’s porosity makes preparation more important than technique. Scrub the pot, remove salt deposits, dry it thoroughly, and apply thin coats of paint. Outdoor pots need a clear exterior sealer, and pots with living plants call for a deliberate decision about sealing the inside.
Because sources disagree on that last point, think about how the pot will be used before you begin. A little planning at the start prevents the peeling and bubbling that frustrate most first attempts. For more practical craft and home guides, explore the full library at Shani Levni.
Frequently Asked Questions
Do you need to prime terra cotta before painting?
Not always. Indoor decorative pots can often take paint directly, though primer smooths light colors. Outdoor pots and pots holding plants benefit from a primer or terra cotta sealer.
Should you seal painted terra cotta pots?
Yes, if they will sit outdoors. Use a clear exterior acrylic sealer. Indoor pots do not always need one.
Can you paint the inside of a terra cotta pot?
Avoid ordinary craft paint inside a pot that holds soil. If you want to seal the interior, use a non-toxic terra cotta sealer.
How long should terra cotta dry before painting?
At least 24 hours, and some guides recommend 24 to 48 hours. The clay holds moisture even when the surface feels dry.
What paint works best on terra cotta?
Acrylic craft paint works for indoor pots, exterior acrylic suits outdoor pots, and spray paint made for porous surfaces is a fast option for solid colors.
Why is my paint peeling off my terra cotta pot?
The usual cause is moisture moving through the clay and lifting the paint from behind, or paint applied over salt deposits or a damp surface. Strip the paint, scrub and dry the pot, seal it, and repaint in thin coats.