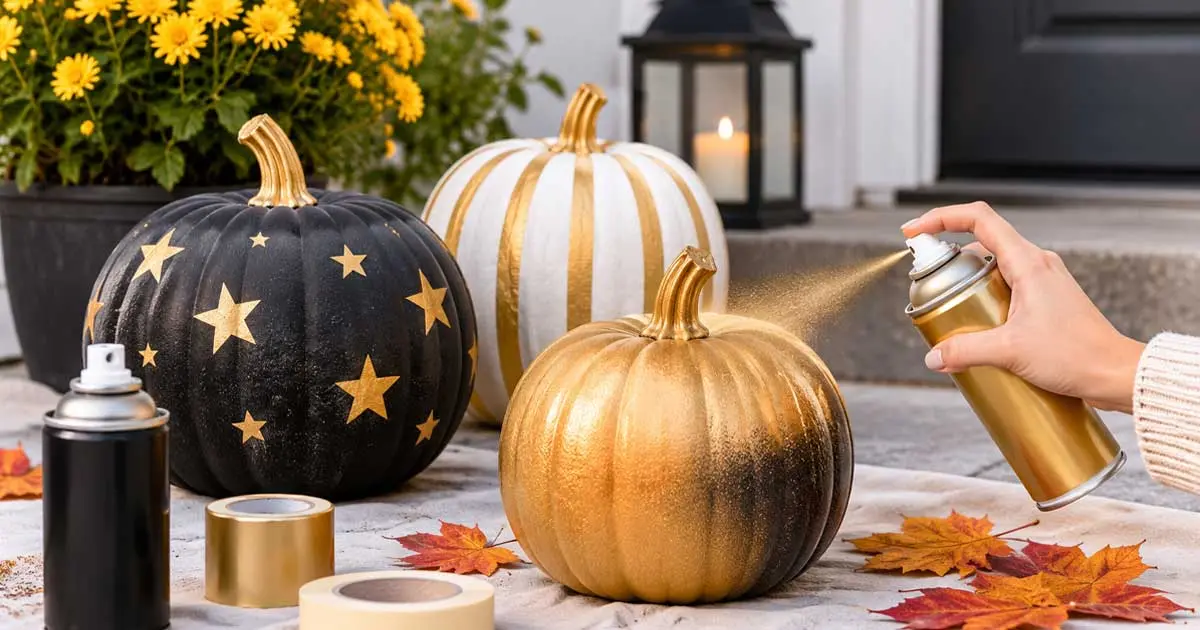
To begin with, determine if the pumpkin is real, foam, or plastic. A real pumpkin should be painted two or three thin layers of spray paint and then sealed with a clear coat after the paint has dried. A foam craft pumpkin is not like that, as the solvents in regular spray paint will break down the foam. Use a canned foam that is marked safe for foam or brush acrylic paint. Always spray outdoors. The following sections will describe each of these and what errors kill a finish.
Key Takeaways
- Inspect pumpkin first. Ordinary spray paint will work on real pumpkins, but not on foam craft pumpkins.
- Wash and completely dry a real pumpkin; apply 2-3 thin layers instead of one thick layer.
- If you are using foam pumpkins, make sure to use a can that says it is safe for foam, or, if you are painting them, paint them with acrylic paint or gesso as a barrier. Test on the reverse side.
- If pumpkins are to be left outside, seal them with a clear acrylic spray. A sealer will keep the paint from spoiling, but will not prevent the real pumpkin from rotting.
- Spray outside, avoid painting on a pumpkin you intend to cook or eat, and avoid using a pumpkin near fire.
Which pumpkin do you have, real, foam or plastic?
The type determines the type of paint that is safe. The Paintly says that most pumpkins sold for the fall are filled with expanded polystyrene foam under a thin skin. Typically, very light and uniform pumpkins are foam.
| Pumpkin type | Ordinary spray paint | What to do |
| Real, uncarved | Safe | Wipe clean, dry fully, spray thin coats, seal |
| Foam craft | Not safe | Use a can labelled for foam, or brush on acrylic or gesso first |
| Hard plastic | Safe with prep | Apply a plastic-bonding primer, then thin coats of paint |
Brand names are not enough to decide the foam issue. Different foam warnings are listed on the labels of two brands of the same product, and Web sites don’t agree on which cans are safe. Check can and test on a concealed location.
What You Need
- Paint with spray paint in colors of your choice
- Matte or satin clear acrylic spray sealer
- A damp cloth and a dry towel.
- Drop cloth or cardboard to cover the work surface
- Painter’s tape
- Gloves and, if necessary, a respirator with organic vapor cartridges for longer use.
- A primer for hard plastic pumpkins that can be bonded together using plastic.
Step-by-Step: Painting a Real Pumpkin With Spray Paint
- Select a solid pumpkin. Do not soft spots as paint will not prevent them from spreading.
- Clean the rind. Wipe off with a wet cloth and allow to dry thoroughly. Mad in Crafts says the same, and The Paintly warns that paint will flake off if it’s painted on a wet rind.
- Set up outdoors. Cover with cardboard and prevent wind and open flames. Small pumpkins can be knocked over by the power of the spray, so Pine & Poplar recommends using painter’s tape to loop between the base and table.
- Shake the can and test it. Spray a few seconds onto cardboard to check the color and the spray pattern.
- Use a light initial application. It is important to keep the can moving and spray it from multiple angles as a pumpkin is round.
- Add 2 more thin coats. Allow drying time between coats as specified on the label. Coats are a problem because they are heavy and drip.
- Allow the top to dry, and then flip the pumpkin over. Pine & Poplar waited 24 hours before flipping pumpkins, the dry-to-handle time of the paint they used. Other paints take 10 to 15 minutes per coat to dry to the touch – check the label on your can.
- Seal the paint. If the pumpkin is going to be kept outdoors, spray it with two thin layers of clear acrylic spray sealer. Upstate Hous recommends approximately 30 minutes for each coat.
Painting Foam Pumpkins and Plastic Pumpkins
Foam Pumpkins
Common spray paint solvents and propellants will dissolve polystyrene, and can show up in seconds. There are two safe choices.
- Use a safe for foam labeled can. Look for the claim on the label, and test on the underside first.
- Create a barrier. The Paintly suggests that the pumpkin be sealed with 2 coats of brushed acrylic or gesso before being sprayed, so the cured film will keep the solvent from touching the foam.
Use acrylic instead of spray paint if you only have a foam pumpkin. There is no technique that is safe for use with bare foam and solvent spray.
Hard Plastic Pumpkins
The paint must have something to adhere to, otherwise it will not stick to slick plastic. The Garden Style suggests using one coat of plastic-bonding primer, 15 minutes dry, then two or three light coats of paint and a matte sealer.
Why Thin Coats Work
All of the sources we found agree: multiple thin layers are better than one thick layer. Thin layers dry evenly and don’t drip, and minimize melting foam.
The idea is old. It is a technique that painters have employed in the past for building up depth, and oil painters of the Italian Renaissance used thin glazes to add soft light to their landscapes, like the ones in our guide to italian renaissance painting about solitude. It’s a smaller story, a pumpkin, but the concept is the same. Add colour gradually and allow it to settle.
Safety When Spraying Pumpkins
Although the project seems like a craft, spray paint is a chemical product.
- Spray outdoors. The U.S. Consumer Product Safety Commission’s Art and Craft Safety Guide recommends painting outdoors or in a fume booth if possible.
- Mind the flames. The same guide says that propellants used in aerosol products “may be flammable. Keep cans away from candles, heaters, and grills.
- Protect your lungs. A dust mask will not protect against solvent vapors. Use NIOSH-approved respirator with organic vapor cartridges for long exposures.
- Avoid children and pets while spraying and until the paint dries.
- Avoid eating or cooking a painted pumpkin! Spray paint is not food safe. Leave the pumpkin unpainted if you plan to use it for cooking.
- Properly dispose of cans. Never pierce or set on fire aerosol cans. Over-painted paint is collected by local household hazardous waste programs.Over-painted paint is collected by local household hazardous waste programs.
Common Problems and Fixes
| Problem | Likely cause | Fix |
| Paint peels or lifts in sheets | The rind was damp or dirty | Strip, wipe clean, dry fully, and repaint |
| Surface melts or puckers | Foam pumpkin and solvent paint | Switch to brushed acrylic or a foam-safe can |
| Drips and runs | Coat applied too thickly | Use thinner coats and move the can steadily |
| Pumpkin tips over | Light pumpkin and strong spray | Tape the base to the table |
| Finish stays tacky | Not enough drying time | Wait longer, in a dry and warm spot |
| Color fades outdoors | No sealer or weak sealer | Apply exterior-grade clear acrylic sealer |
Design Ideas That Suit Spray Paint
Smooth, even color in a flash – spray paint is good for bold, simple looks.
- A matching set. Create a collection of several different sizes using one color family (white, gray, and metallic).
- Textured stone finishes. Pine & Poplar applied textured stone-effect paint to small faux pumpkins to display on a table and covered them with three coats in less than 5 minutes.
- A glitter accent. After the paint dried, Mad in Crafts added the spray adhesive and glitter and then sealed it for use outdoors.
- Painted stems. Just a metallic stem on a matte pumpkin for some contrast with very little effort.
Like to decorate on screen? A pumpkin carving scene appears among the items listed in our guide to retired delina crafts mystery capsule 2025 items, a Neopets customization collection.
Conclusion
Spray painting pumpkins is fast, but it will require a few decisions in the beginning. Determine the type of pumpkin, select paint color based on the surface, and apply paint in a thin layer. The rinds of real pumpkins should be clean and dry. Foam pumpkins should be painted using foam-safe paint or a brushed acrylic barrier. Outdoor spraying, a sealer and patience between coats are all that every pumpkin needs.
With this treatment, a handful of paint cans can transform plain pumpkins into a set that will last the season. Check out the Shani Levni library for more practical guides and craft ideas.
Frequently Asked Questions
May spray paint a REAL pumpkin?
Yes. Ordinary spray paint won’t harm real pumpkin rind. Clean, dry thoroughly and thin coats.
Can spray paint melt a pumpkin out of foam?
Yes, in most cases. Normal spray paint contains solvents that will dissolve polystyrene foam. Apply with a can marked safe for foam or brush with acrylic or gesso and test on the bottom of the can.
How many coats of spray paint will it take to paint a pumpkin?
Typically, 2-3 thin coats are sufficient. Wait for the coat to dry as indicated on the label.
How many minutes does it take spray paint to dry on a pumpkin?
It varies according to the product. There are some paints that can be handled lightly in 10 to 15 minutes per coat, and others that require 24 hours. Follow the label on your can.
Is a pumpkin spray painted and needs to be sealed?
Seal if it is to be left outside or used frequently. Clear acrylic spray sealer will keep the paint from fading and getting wet from rain. It will not keep a real pumpkin from rotting.
Can a real pumpkin be made to explode with spray paint?
This has only been reported on one craft blog, and no authoritative source has supported this. The actual danger is common rot, which can happen to painted as well as unpainted pumpkins.
Is it safe to eat a pumpkin if it is spray painted?
No. Spray paint is not food safe, so store painted pumpkins for display.